A fundamental understanding of OSC systems is required. Familiarize yourself with the infrastructure at Onboarding OSC Systems.
Create the Application
Ideally a user will begin the app creation process with a working batch script.
Log in via ssh to glenn.osc.edu
cd to your awesim dev environment
cd awesim_devCreate a new rails application using the AweSim rails application template https://github.com/AweSim-OSC/rails-application-template
awesim rails new starccmThis will create a new rails application and provide much of the underlying framework for app creation. This also runs the bundle install command and initializes a git repository.
Rename the application to work in your developer environment. For this example, we are using the rails9 folder, but you are free to use any of rails1/ - rails9 for development. If you use a different folder, be sure to update your references accordingly throughout this tutorial.
mv starccm/ rails9/
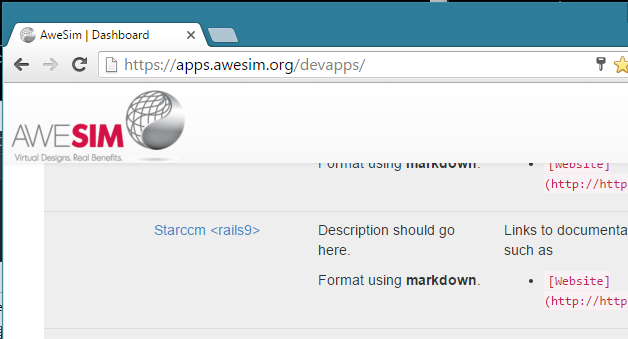
cd rails9At this point, your app can be loaded from your AweSim developer dashboard. Since we are working in the rails9 directory for this example, the application is available at https://apps.awesim.org/awesim_dev/rails9/
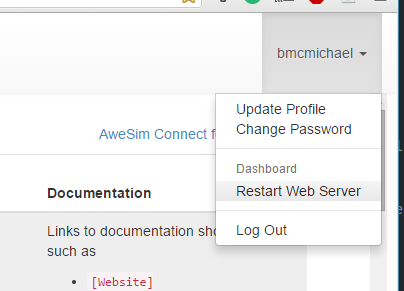
Restart your apache instance.
Throughout this tutorial you will occasionally need to restart your development apache environment. To do so, click the "Restart Web Server" link in the menu at the top-right corner of your AweSim dashboard.
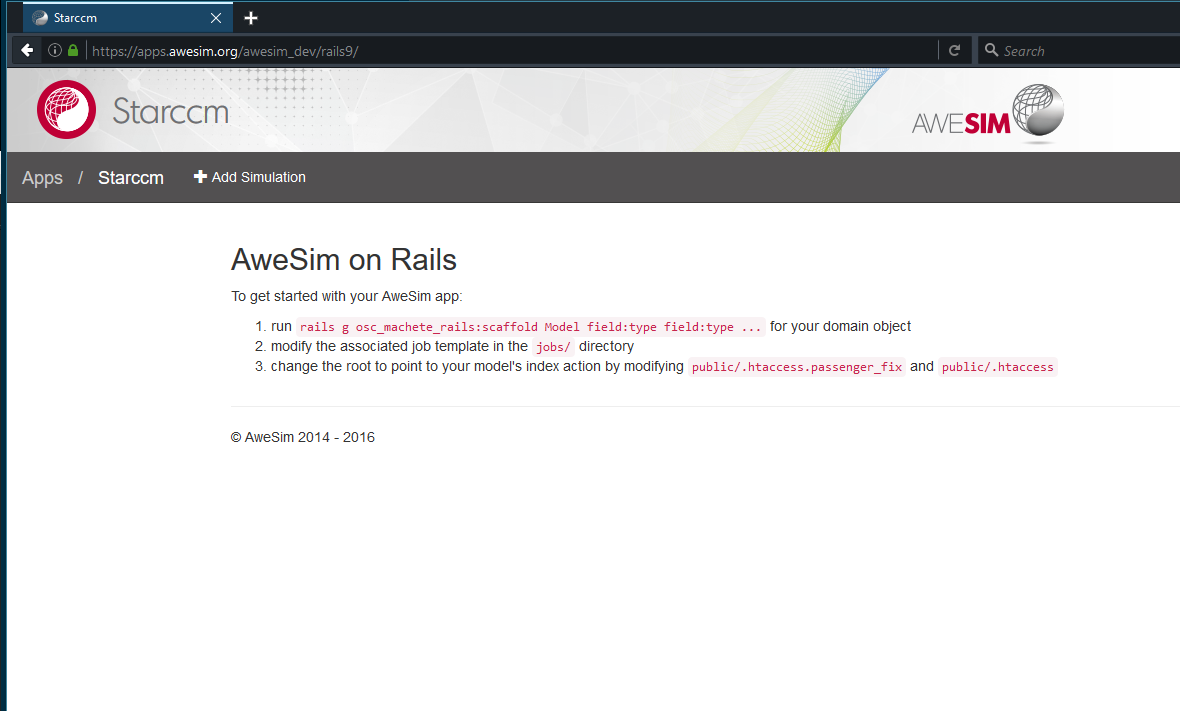
View the application
After you restart your web server, a basic rails application is available with some additional instructions.
Prepare the Scaffold
Prepare your batch script. Following is an example batch script used to submit a job to StarCCM.
#PBS -N StarCCM
#PBS -l walltime=01:00:00
#PBS -l nodes=1:ppn=12
#PBS -j oe
#PBS -S /bin/bash
cd $PBS_O_WORKDIR
module load starccm/10.04.009
starccm+ -batch MeshAndSave.java basicGravitySandCastingGeo.sim >&output.txt
This script can be parameterized for general use.
Possible parameter options include:
-
walltime:int(we will do this in hours) -
version:string -
config:file -
input:file -
jobname:string
We parameterize the scripts using mustache tags. The parameterized script looks like:
#PBS -N StarCCM
#PBS -l nodes=1:ppn=12
#PBS -l walltime={{{walltime}}}:00:00
#PBS -q @oak-batch.osc.edu
#PBS -j oe
#PBS -S /bin/bash
cd $PBS_O_WORKDIR
module load starccm/{{{version}}}
starccm+ -batch {{{config}}} {{{input}}} >&output.txt- Note that we are using three brackets for parameterized inputs, as this prevents substitution of special characters with html entities.
(We will continue to hardcode the name in the batch script to reduce probability user input errors on the system, but provide a meaningful job name to the user within the rails app.)
Based on this list, we can start preparing our initial rails scaffold.
For file management, we will be using the paperclip gem, so those will need to be added to our model and schema separately.
We can now generate our initial schema using the following command:
rails g osc_machete_rails:scaffold Simulation name:string walltime:integer version:stringThe osc_machete_rails:scaffold invokes a custom generator that provides a standard rails model and set of views that have been optimized for the AweSim rails environment. This generator also provides an osc-machete job object model and schema that is attached to your new simulation model. To learn more about the osc_machete_rails generators, use the --help flag on the command line. (ex. $ rails g osc_machete_rails:scaffold --help)
Because this generator creates two new schema in the database (one for your simulation and one for a job object that is attached to the simulation), you will need to migrate your database twice.
rake db:migrate
rake db:migrate
App configuration
Change the root
The root of an AweSim app in development should be set by modifying the public/.htaccess file.
Find the line that includes: RewriteRule ^$ %1pages/index [L]
Modify it to: RewriteRule ^$ %1simulations/ [L]
You will also need to repeat this step in the public/.htaccess.passenger_fix file to be able to later deploy this as a shared app.
This will reroute requests for / to your simulations path.
Be sure to restart your apache server from the AweSim developer dashboard after the change.
Change the app title
By default, the application will use the titleized name of your app, here "Starccm".
We'd like to change this to a custom title, like "Star-CCM+"
To make this change, edit the initializer at config/initializers/awesim_rails.rb and uncomment the following.
config.app_title = 'Star-CCM+'This change will require that you restart your apache server at the developer dashboard to take effect.
See the AwesimRails Documentation for additional AweSimRails configuration options.
Update the manifest
The app metadata that is displayed on the user dashboard is located in the manifest.yml file. We'll modify this document to show us the app title and description on the dashboard.
in manifest.yml:
---
name: Star-CCM+
description: |-
  Provides batch access to Star-CCM+
documentation: |-
  * [Star-CCM+ @ OSC](https://www.osc.edu/supercomputing/software/star_ccm)
  * [Star-CCM+ @ CD-adapco](http://www.cd-adapco.com/products/star-ccm)
Navigation links
"Add Simulation" Link
An "Add Simulation" link is supplied to the navigation bar application template. This should be updated to direct users to the new_simulation path.
In app/views/layouts/application.html.erb, locate the line: <%= link_to '<span class="glyphicon glyphicon-plus"></span> Add Simulation'.html_safe, "#" %>
Modify "#" to new_simulation_path
If your model is named something else, find your path by using rake routes at the command line.
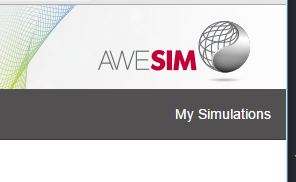
"My Simulations" Link
A "My Simulations" link is provided in the top-right corner of the app. To prevent this link from returning you to the default page, you will need to edit your application root path in config/routes.rb
Modify root "pages#index" to root "simulations#index"
You will need to restart your apache instance for this change to take effect.
Documentation
A basic application template has support for markdown-formatted documentation. Adding documentation to docs/Home.md will automatically add a link to the navigation bar to that location.
By this mechanism documentation can be versioned separately from the application and can be cloned directly from a Github Wiki repository, for example.
- Note: The
docs/folder is added to the.gitignoreby default. Remove this entry if you would like to version documentation in the application repository.
Update the batch script
At this point your app is ready to submit a job. If you fill out the form and submit a job, the application will submit the script located in jobs/simulation/main.sh.mustache. Submitting a job will echo your variables and sleep for 30 seconds. You may wish to try submitting a job now to confirm that everything is working up to this point.
Once you're satisfied that the submission process is working, replace the default batch script with our own.
In jobs/simulation/main.sh.mustache, replace the contents with:
#PBS -N StarCCM
#PBS -l nodes=1:ppn=12
#PBS -l walltime={{{walltime}}}:00:00
#PBS -q @oak-batch.osc.edu
#PBS -j oe
#PBS -S /bin/bash
cd $PBS_O_WORKDIR
module load starccm/{{{version}}}
starccm+ -batch {{{config}} {{{input}}} >&output.txt
Note the templated variables include the config and input files, which aren't part of our model. We'll add those next.
Add files to the model
Now, we're going to add the files to the model. In order to implement the "copy" functionality of the app while supporting file attachments, some additional handling is required.
These instructions will describe how to copy a simulation with a single click. (Optional) If you wish to send the user to an edit form upon copy (to validate inputs, for example) you will need to cache your files first. If you wish to implement this feature, a full guide is available here: https://github.com/AweSim-OSC/internal/wiki/Add-File-Upload-to-Simulation
For this application we will be adding support for two file uploads, the configuration (*.java) file and the input (*.sim) file.
Generate the paperclip scaffold
At the command line, run the generators to create two new paperclip models, then migrate your database:
rails generate paperclip simulation input
rails generate paperclip simulation config
rake db:migrate
The paperclip gem is included in the rails-application-template. This adds the file handling functionality to your schema. There are some additional steps that need to be performed to link the files to your model to and views.
Add the files to your simulation model
Add the following lines to the top of the model at app\models\simulation.rb
class Simulation < ActiveRecord::Base

...

  has_attached_file :input
  do_not_validate_attachment_file_type :input
  validates_presence_of :input

  has_attached_file :config
  do_not_validate_attachment_file_type :config

...
This will associate your new files with the model and make input a required file. config will be an optional user input.
Update the copy method to copy the files
Next, modify the copy method in the model to insert the code that will properly copy files.
  # Make copy of the workflow
  def copy
    new_simulation = self.dup
    new_simulation.input = self.input    # copy the input file
    new_simulation.config = self.config  # copy the config file
    new_simulation
  end
Update the model to copy the files to the simulation staged directory
Finally, locate and uncomment the block of code for the after_stage method
# Define tasks to do after staging template directory typically copy over
# uploaded files here
def after_stage(staged_dir)
  # CODE HERE
end
Replace the # CODE HERE comment with the following code:
target = staged_dir
FileUtils.cp input.path, target
FileUtils.cp config.path, target unless config.blank?
The after_stage method gets called when the simulation gets staged by osc-machete. Adding these lines ensures that your input files will be copied over to the staging folder where the job will be able to access it. Note: unless config.blank? allows for the config file we've been using to be an optional input.
Add the file input elements to the views
In app/views/simulations/show.html.rb, add the following lines to the form immediately after the version element and before the "back" link.
<p>
  <strong>Input:</strong>
  <%= link_to @simulation.input_file_name, @simulation.input.url %>
</p>

<p>
  <strong>Config:</strong>
  <%= link_to @simulation.config_file_name, @simulation.config.url unless @simulation.config.blank? %>
</p>
In app/views/simulations/_form.html.rb, add the following lines to the form builder immediately after the :version field element.
<%= f.file_field :input, label: 'Input (.sim file)', class: 'btn btn-default col-md-12' %>
<%= f.file_field :config, label: 'Config File (Optional: .java)', class: 'btn btn-default col-md-12' %>
Accessing data in your template script
You can access your model data in the template using the attribute tags. The paperclip gem adds helpers that retunrn the string file name when called with the _file_name suffix, so we will need to update our template to access the name of the file.
Back in jobs/simulation/main.sh.mustache, modify the line that calls starccm+ to use the following tags:
starccm+ -batch {{{config_file_name}} {{{input_file_name}}} >&output.txtThe app can now submit jobs with file attachments to Oakley.
To access the results of the simulation, please see the tutorial about Accessing Output and Error Files